Are you keen to create a popup that can drive more interaction and engagement on your website?
There is no need to worry. With the right guidance and a few simple steps, you can create stunning popups that will help increase engagement on your website, capture leads, and communicate important information to your visitors.
Introduction to Popups
First, we will understand why we use popups and why they are important to any website.
A popup, also known as a pop-up window or pop-over, is a graphical user interface (GUI) element that appears on top of a web page in an overlay window. Popups are usually triggered by user actions such as clicking a link, hovering over a page area, or scrolling to a certain point. The purpose of a popup is to provide an additional layer of interactivity that can be used to communicate important information or promote specific offers.
When using a popup on your website, it’s important to ensure that you provide the right content in a way that doesn’t interfere with the user experience. For example, Popups can encourage people to subscribe to newsletters, promote special offers or discounts, suggest helpful resources, and collect customer feedback. They can also be used as an exit intent strategy. When someone appears to be leaving your site, you can use a popup to ask them why they are leaving and suggest an alternative action. This can be incredibly effective in increasing customer loyalty and reducing the amount of lost website traffic. Furthermore, popups are also useful for cookie notifications, GDPR compliance, age verification, and more. Overall, popups provide a great way to communicate with website visitors in an effective and timely manner.
Popups are also useful for collecting customer insights, providing tailored content, showcasing new products/services, and redirecting visitors to other pages. By using popups strategically, you can ensure that your website engages with its audience in the most effective way possible.
Use cases of Popups
Here are a few examples of how Popup can be used in different industries and applications:
- E-Commerce: Popups can be used to create popups that promote special offers, discounts, and new products to online shoppers. For example, a clothing retailer could use Popup Builder to create a popup that appears when a user adds an item to their shopping cart, offering them a discount code for their purchase.
- Lead Generation: Popups can be used to capture leads by creating popups that ask users to sign up for a newsletter or follow the company on social media. For example, a real estate company could use Popup Builder to create a popup that appears when users visit their website, asking them to provide their email addresses in exchange for access to exclusive listings and property updates.
- Event Promotion: Popups can be used to promote events and conferences by creating popups that provide information about the event and offer a discount for early bird tickets. For example, a conference organizer could use Popup Builder to create a popup that appears when a user visits their website, providing details about the conference and offering a discount code for tickets purchased in the first week.
- Social Media Integration: Popups can be integrated with social media networks to create popups that encourage users to follow the company on social media or share content. For example, a travel company could use Popup Builder to create a popup that appears when a user clicks on a blog post, asking them to follow the company’s Instagram account or share the post on Facebook.
- Customer Support: Popups can be used to provide customer support by creating popups that allow users to contact the company directly or access resources such as FAQs and tutorials. For example, a software company could use Popup Builder to create a popup that appears when a user is having trouble using their product, providing them with a link to a support page or a form to submit a support request.
Have you ever struggled to create a popup using Bricks Builder and don’t know how to start? Then look no further! This step-by-step guide outlines about how easy it is to make one using the popular Bricks page builder. By implementing popups, visitors will be encouraged to take action with helpful messages and efficiently increase conversions for your business – all from just following this informative tutorial.
How to create a popup using Bricks Builder
To make a popup using the Bricks page Builder, use a Popup Template. We will demonstrate how to create a newsletter subscription form using Popup Builder by following these steps:
Create a new popup Template:
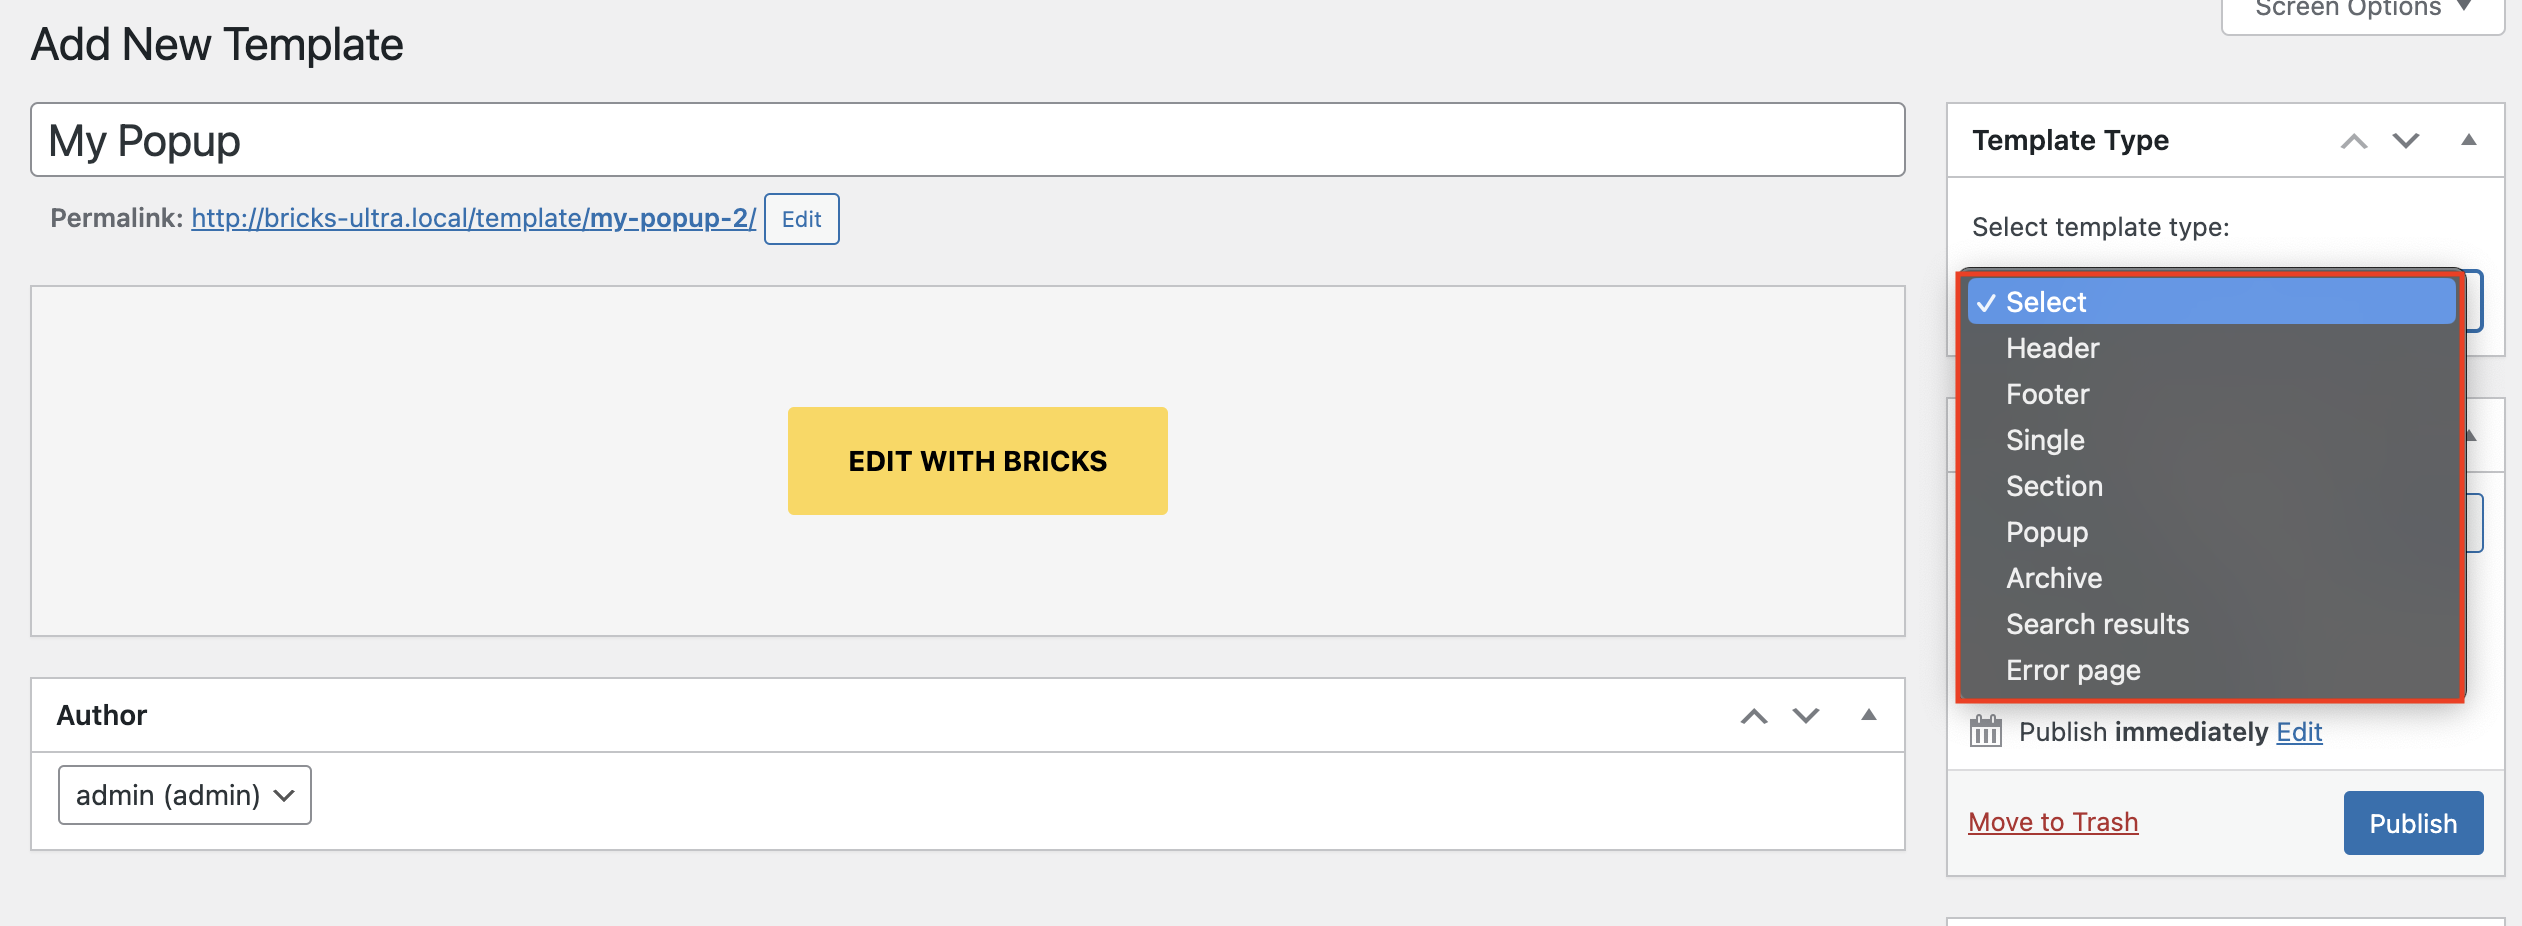
- Navigate to Bricks ➝ Templates in the menu and press the Add New button to create a new popup.
- Name the template, for example, “My Popup.”
- Select the “Popup” option from the Template Type dropdown in the right-hand sidebar.
- Press the “EDIT WITH BRICKS” button to edit the template and access the unique interface for the Popup Builder.
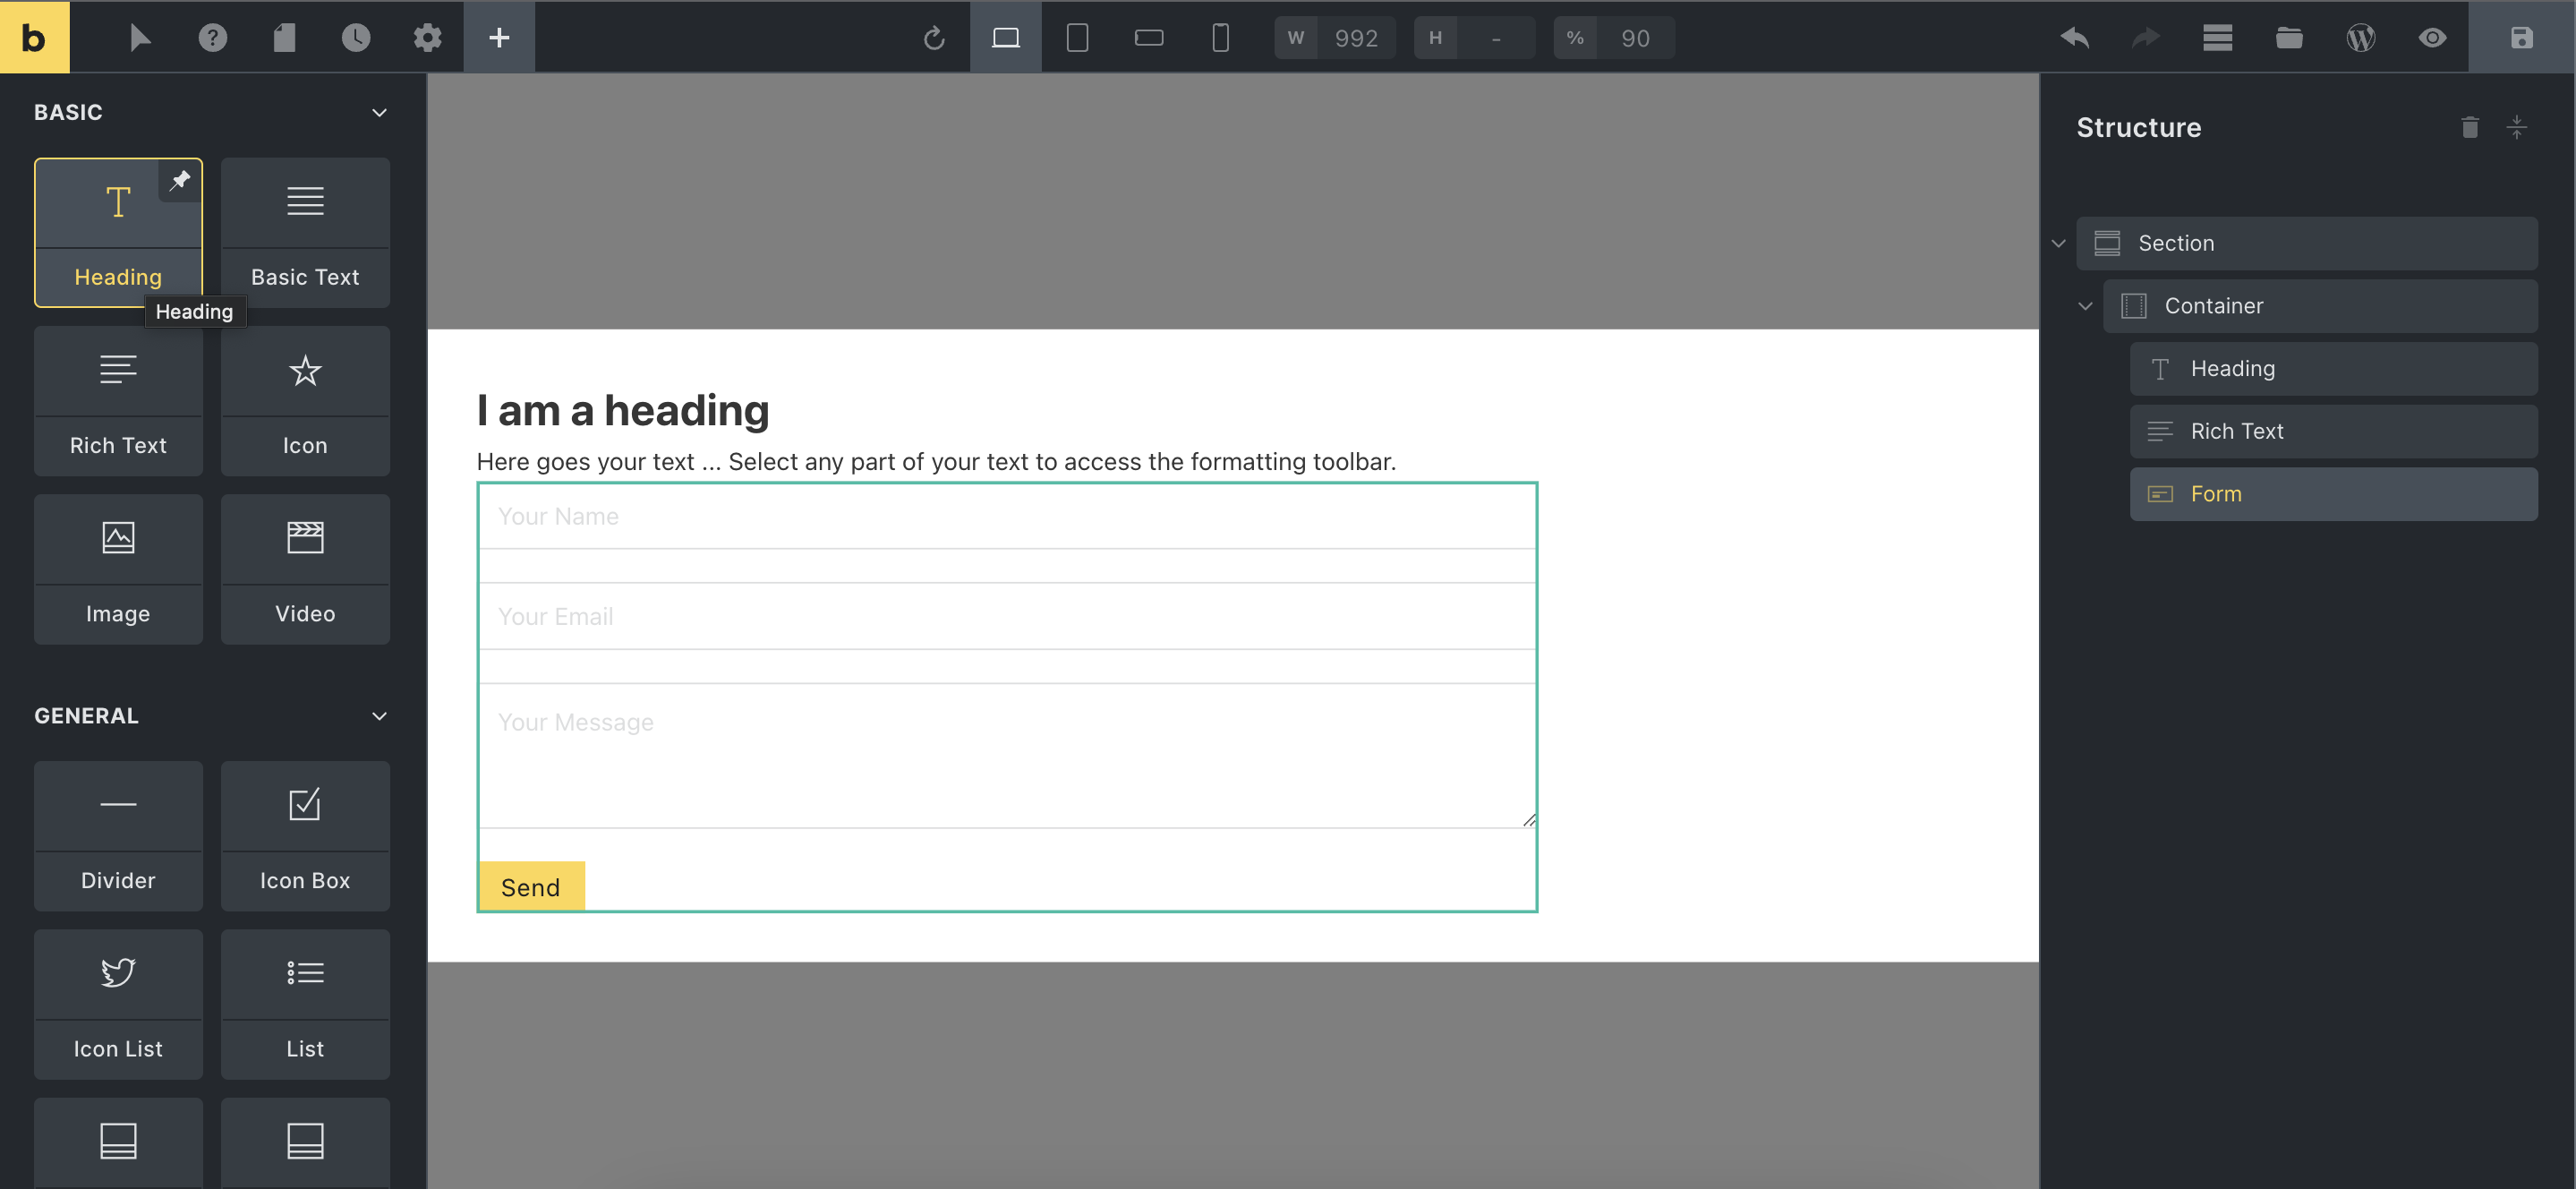
Design your popup:
- Click on any element to add it to your popup.
- Here I am creating Subscribe form, so for that, I select the heading, basic text, and form elements to create a subscribe form and capture email leads.
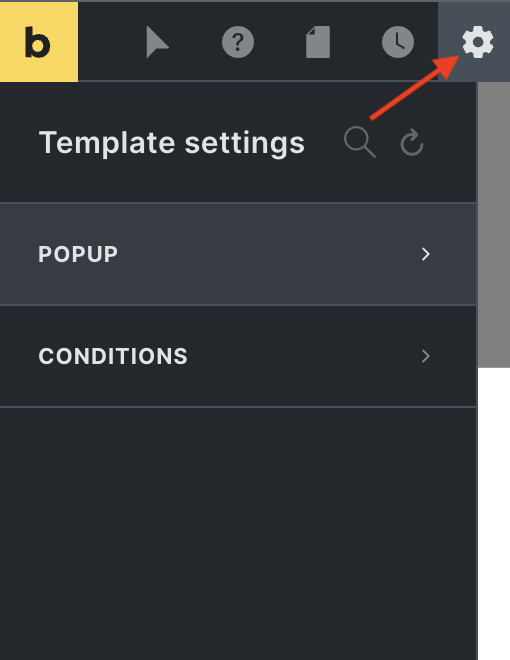
Popup Settings:
To customize the settings of your popup, click the settings button on the top toolbar. Navigate to Settings ➝ Template Settings ➝ Popup, and adjust the settings as per required.
Popup Conditions
Utilize template conditions to specify where the popup will appear on your website. In the settings, you can choose to display the popup on the entire website or in specific locations based on conditions by navigating to Settings➝ Template Settings➝ Conditions.
Interactions
You can locate the “Interactions Control” section in the settings panel of the popup. This section can set triggers that open/close the popup.
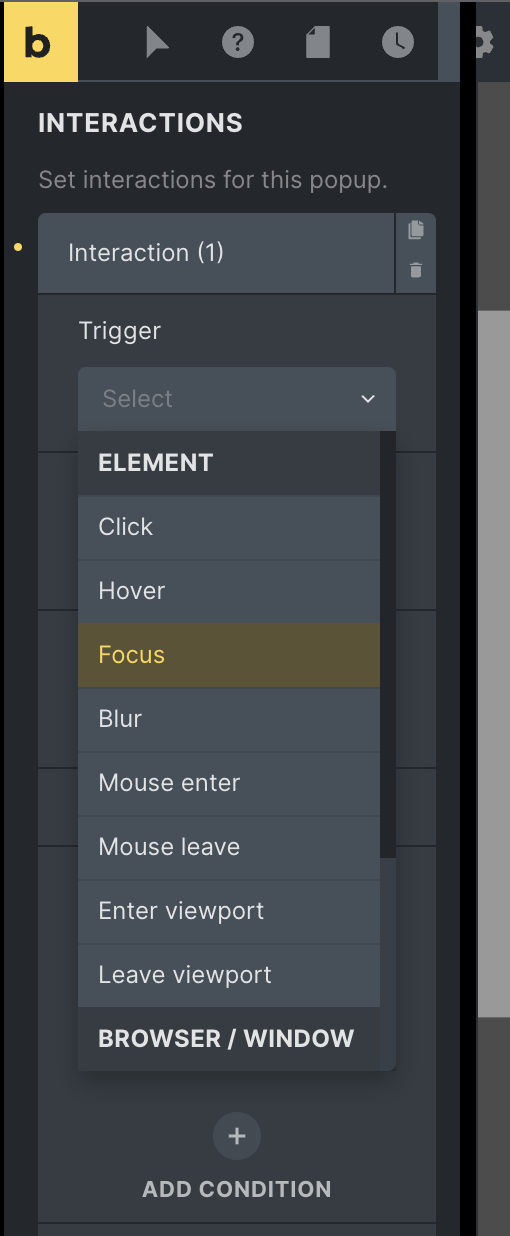
Set the trigger event
There are two types of triggers available. The first type, called the Element trigger, is used when you want to set a trigger for a specific element. For example, a popup can be set to open when a user clicks on a certain element. Examples of element triggers include Click, Hover, Focus, and Mouse Enter. The second type of trigger is based on browser events, such as Content Loaded, Scroll (by a certain number of pixels), and Mouse Leaves Window.
A popular trigger is to display the popup once the content has loaded (e.g., newsletter subscription, special offers, etc.). To do this, set the interaction to “Content Loaded,” as shown.
NOTE: Clicking outside the popup content (on the overlay) or pressing the ESC key will close the popup.
If no interactions are defined on the popup itself or any other element on the page that triggers the popup to show, the popup remains hidden.
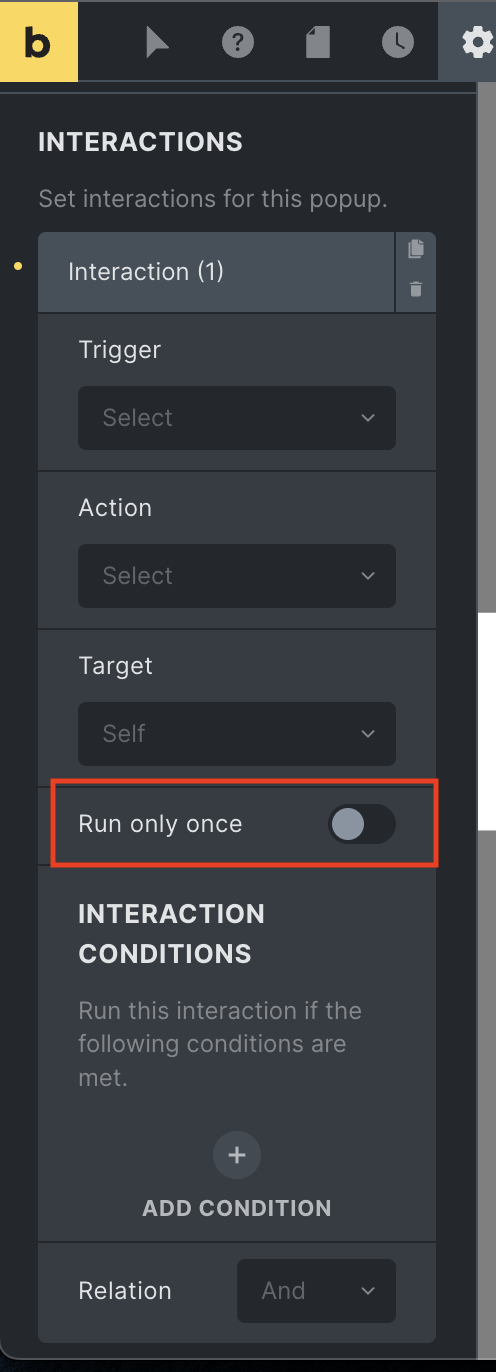
Set the action
In the action dropdown, you can specify the action to be taken when the trigger is performed, such as showing or hiding the popup.

Target your popup
Now you can set a target, such as what action to take when the target is hit, such as opening/closing itself, targeting a CSS selector, or targeting a popup.

Popup Limit
By default, the popup appears each time an interaction initiates it. To restrict the frequency of the popup’s appearance, navigate to settings➝ template-settings ➝ popup. Once the set limit is reached, the popup will no longer be shown.
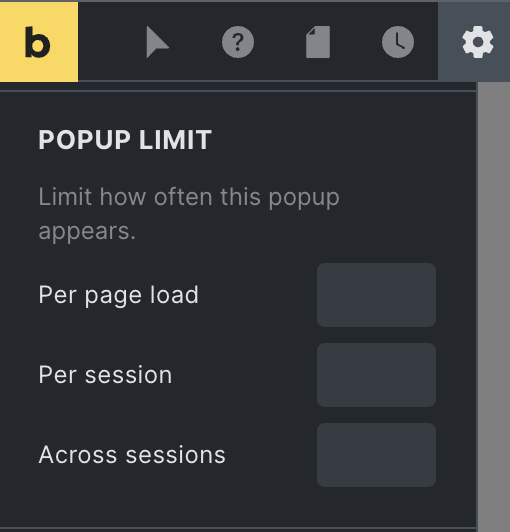
Three types of limit options are available, which will increase the count every time the popup is displayed.
| Per page load | window.brx_popup_{id}_total | It will reset after the page loads |
| Per session | sessionStorage.brx_popup_{id}_total | It will reset after the tab closes |
| Across sessions | localStorage.brx_popup_{id}_total | It will reset once deleted |
Add a close Popup icon using interactions.
To include a close icon that will close the popup when clicked by the user, follow these steps:
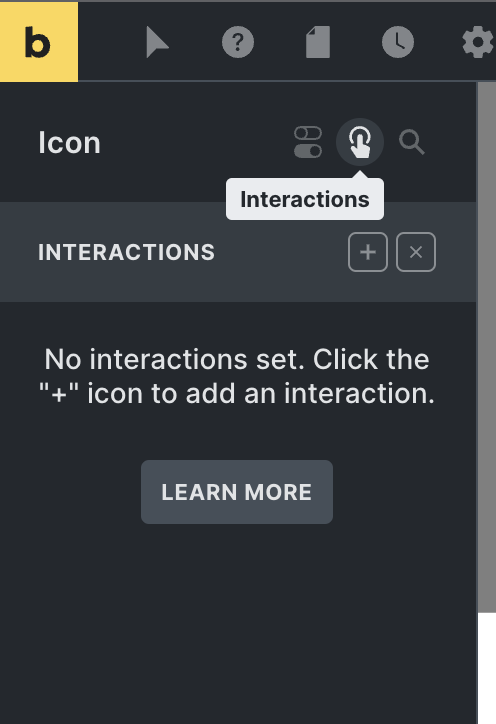
- Insert an icon element in the popup and select the interaction panel.
- Click the “add” button to add a new interaction for the click event.
- Set the trigger as “click.”
- Set the action as “hide element” and target as the “popup.”
- To reuse the icon interaction in multiple locations, make the element global. To do this, target it using the CSS selector ‘.brx-popup‘, the default class applied to all popups in Bricks Page Builder.
- This popup will function according to specified interactions if the conditions are met. These conditions include Per page load, per session, and across the session. You can include multiple interaction conditions by applying logical operators.
- Now, publish the popup and view it on the front end.

Example of Popups in Bricks Builder
Showcase posts/logos within the Popup via a Query Loop
As a store owner, if you desire to display a popup that includes your discounted products, you can add a popup inside a query loop using a Popup Template. You need to enable the query loop in the container, select the product post type, and adjust the parameters as desired. You also have the option to include or exclude specific products manually.
Exit intent – Display a popup when the cursor exits the browser window
You can activate a popup using Exit intent. This will display a popup when the cursor exits the browser window. To do this, navigate to Settings ➝ Template settings ➝ Popup and interactions. Here you can choose the trigger as the mouse leave. If you want the popup to appear only once, you can enable the “Run it only once” toggle button.
Display the popup only to logged-in users
You can use a condition to display the popup only to logged-in users. Choose the outermost element and click on the condition option. Choose “user login” and select “is logged in” so the popup will only appear for logged-in users. You can set conditions according to your requirements.
Display the popup for a specific date and time using the element condition
To display the popup for a specific date and time, navigate to the outermost element’s condition and create a new condition. Here, you can choose the date from the date and time section. Then, specify your desired dates.
Benefits of Popups
There are several benefits to using Popup Builder for creating and customizing popups on a website:
- Increased conversions and engagement: Popup Builder allows users to create targeted and personalized popups that are more likely to convert visitors into customers or leads. Businesses can increase conversions and engagement with their websites by targeting popups to specific users or groups and customizing the content and design.
- Improved user experience: Popup Builder provides a range of customization options that allow users to create visually appealing and intuitive popups that enhance the overall user experience. By using Popup Builder, businesses can create popups that are consistent with their brand and provide a seamless and enjoyable experience for users.
- Simplified design and development process: Popup Builder provides a user-friendly drag-and-drop interface and a range of pre-designed templates and themes, making it easy for users to design and customize their popups without needing any coding knowledge. Popup Builder can also be integrated with a page builder like Bricks Builder, further simplifying the design and development process.
- Improved website performance: Popup Builder provides analytics and tracking tools that allow users to measure the performance of their popups and make data-driven decisions about their design and targeting. Using Popup Builder, businesses can optimize their popups to improve website performance and achieve their marketing and lead generation goals.
- Enhanced targeting and personalization: Popup Builder provides targeting options that allow businesses to display popups to specific users or groups based on factors such as location, language, and device type. This allows businesses to deliver more personalized and relevant content to their users, improving the effectiveness of their popups and increasing conversions.
What are the interactions in the Bricks page builder?
Interactions in Bricks Page Builder refer to the ways in which elements on a webpage can respond to user input or events. Interactions can be used to add dynamic and engaging elements to a webpage, such as hover effects, animations, and popups.
Bricks Page Builder provides a range of interactions that can enhance a website’s design and functionality. For example, users can create hover effects that change the appearance of an element when a user moves their cursor over it or use animations to create smooth transitions between pages or elements. Users can also create popups using Popup Builder, which can be triggered by user input or events such as clicking a button or scrolling to a certain point on the page.
By using interactions in Bricks Page Builder, users can create dynamic and engaging websites that provide a more interactive and enjoyable experience for users.
Stay Tuned to learn more about interactions.
Wrap Up
Here we learned about create a popup using the Bricks builder. It begins by discussing the benefits of using a popup, such as capturing email addresses, promoting special offers, or displaying important information. It then outlines the steps for creating a popup using Bricks, including selecting the appropriate template, customizing the design and layout, and adding any necessary elements such as text, images, and forms. The above article also covers setting up triggers for the popup, such as when it will appear and how often it will display. Overall, this post provides a clear and detailed guide for creating a Bricks Builder popup.
Click here to learn, A Complete Guide to Bricks Builder.