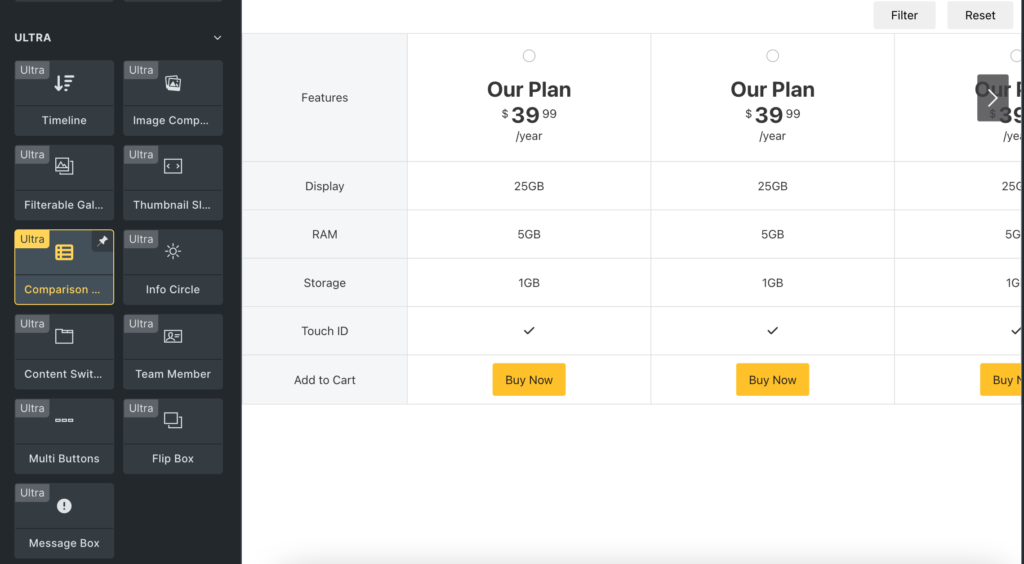
If you need a quick way to compare different product features, then comparison tables can be helpful. For most E-Commerce sites, you must have come across a table that compares related product features. However, using a comparison table to compare different products on your page helps in better decision-making.
So for this purpose, there is an easy solution available for the Bricks Builder theme to compare different products: the Bricks Ultra comparison table. It contains customization options, filtering options, and resetting options that give a more attractive look to the comparison table.
Using the BU Comparison Table feature of our plugin Bricks Ultra serves many purposes. Like, such as comparing products, sales, display schedules, and many more things.
Note – You must have The Bricks Builder theme installed and activated in terms of using Bricks Ultra Plugin.
Step 1: Installation and Activate Bricks Ultra Plugin
To use the Comparison Table element, you must first install and activate the Bricks Ultra plugin.

Step 2: Add Comparison Table Element in Bricks Builder
To create a Comparison table using Bricks, open the Bricks Builder Editor. Drag and drop the Comparison Table element.
Step 3: Content Section Customization
Here you have to choose the number of tables you want to display for comparison.
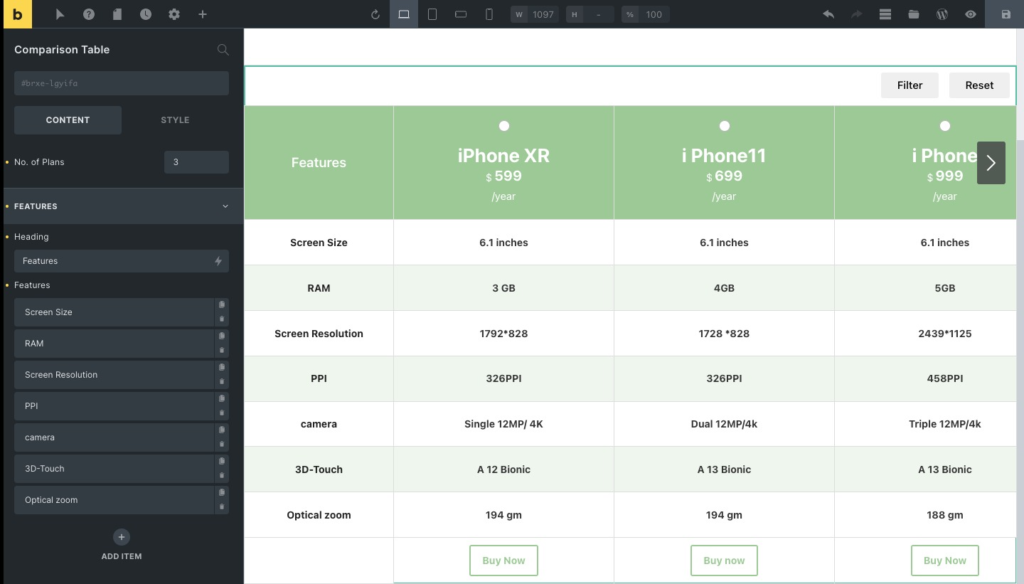
Features: Here, you must mention the heading of the feature section and the items list based on which you will compare. You can add more items or edit/delete the existing ones.
Customizing Individual Table Content
Done with adding features to the table? Now you can customize the table. This section gives you various options to customize the table content. Here you can set the headings of the table header. There are more options available for modification. You can select the currency settings, offer discounts, and add a price package accordingly. An easy toggle is available to enable and disable the discount option.
You can modify the name and assign a link to the Call To Action button. That could be useful to redirect users to your desired option. Now you can add different features to the package and customize it according to your need.
Step 4: Style Section Customization
After setting up the layout, you can style your table with various styling options.
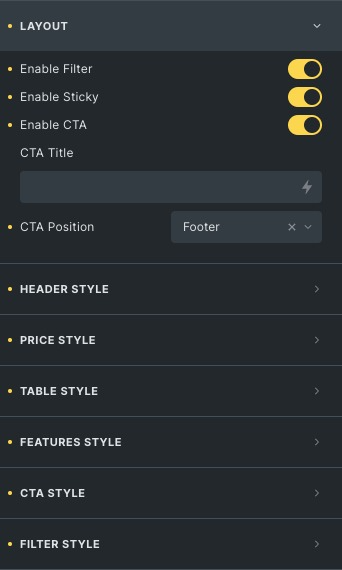
You can set header styles like plan typography, background color, and borders. You can do the same with the feature title. Similarly, there are more styling options available for price styling. For example, you can set pricing, currency, original, and fractional price styling options.
Set styling options for tables like background color, Typography, border options, alignment, etc. You can also set the background color, borders, and typography settings for filter items. In addition, you can give different background colors for alternative rows.
In CTA, you can give styling options for both the CTA button and text, like active checkbox color, background color, vibrant background color, etc. You can also set styling options for the filter and reset buttons also.
Go & Grab the Bricks Ultra Plugin
Wrap up
The comparison table is an efficient way to compare items through different categories, and it’s beneficial when making decisions. These tables are primarily used in E-commerce sites, where customers compare purchases or products offered by sellers on the site before deciding which one they want best!